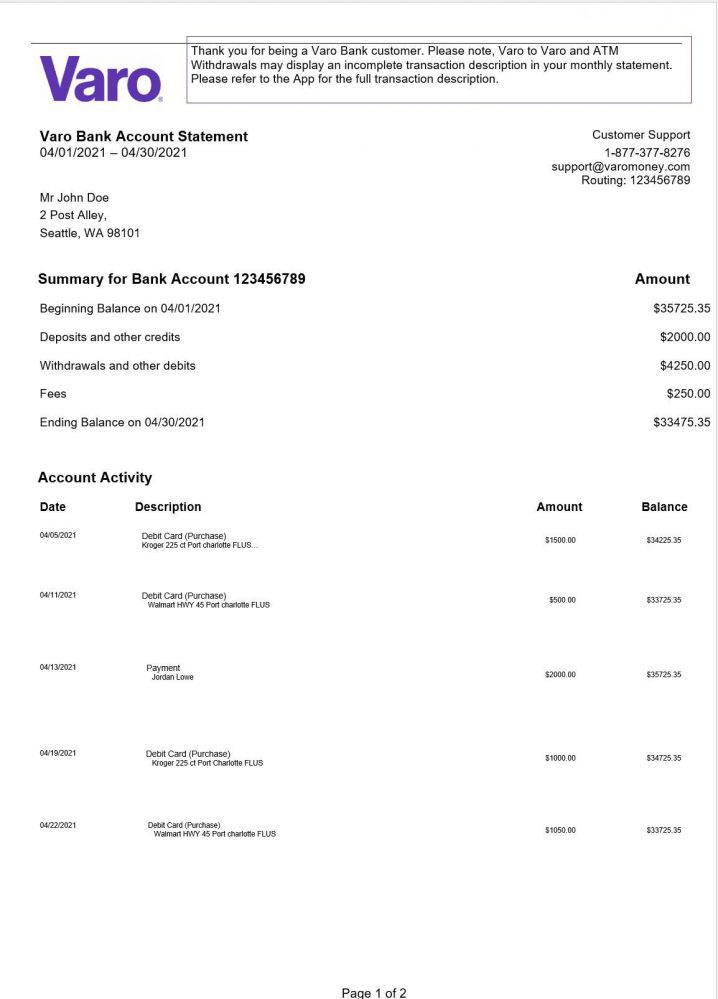
Varo Bank Statement Template
Varo Bank is an all-digital bank that offers innovative and streamlined services for a broad range of customers. Varo was founded in San Francisco in 2015 and prides itself on charging next to no fees, including no fees for zero balances, overdrafts, or monthly maintenance. They do charge small fees for things like out-of-network ATM usage and card replacements.
Varo Bank offers checking accounts and savings accounts with added perks, including early direct deposit. With Varo Bank, customers can receive their paychecks two days early, as soon as their employer submits payroll files, rather than when the deposit is actually received. They also offer up to 15% cashback on select purchases made with the Varo debit card.
Varo Bank Statement Template
Accessing a Varo Bank statement is very straightforward. Using the Varo app, customers can select the “Accounts” page. From there, they’ll have the option of accessing either their Varo Bank account or their Varo Savings account. Customers can navigate to the top-right menu from either account and select “Details” and then “Account Statements.”
Once on the account statements page, Varo customers can choose the year and month for the statement they wish to view. They can then choose to print or email the statement from their mobile phone. Because Varo Bank is entirely digital, customers cannot access anything through a physical branch location. They must download the banking app to access statements.
Varo Bank statements will show the customer’s name and address. Below that, they show the account number and a quick account summary, including the beginning account balance, total withdrawals, total deposits, fees, and the ending account balance. Beneath the summary, the statement shows a detailed transaction history for the account period. Varo also includes a customer service phone number and email address for the customer’s convenience on every statement.
You must log in to submit a review.


